Navratri is here — ready prompts insideSee prompts →

Author: TricksFunnWriter

  • Navratri AI Photo Prompt for Boys: Create a Cinematic Dhol Hero Pose

    Navratri AI Photo Prompt for Boys: Create a Cinematic Dhol Hero Pose

    A white Gujarati outfit, colourful mirror work, glowing festival lights, and a dramatic pose above a decorated dhol—this Navratri photo concept brings the energy of a Bollywood hero entry into an AI portrait.

    Below is the complete Boy Dhol Hero Pose AI prompt, along with instructions for using a reference photo and fixing common generation problems.

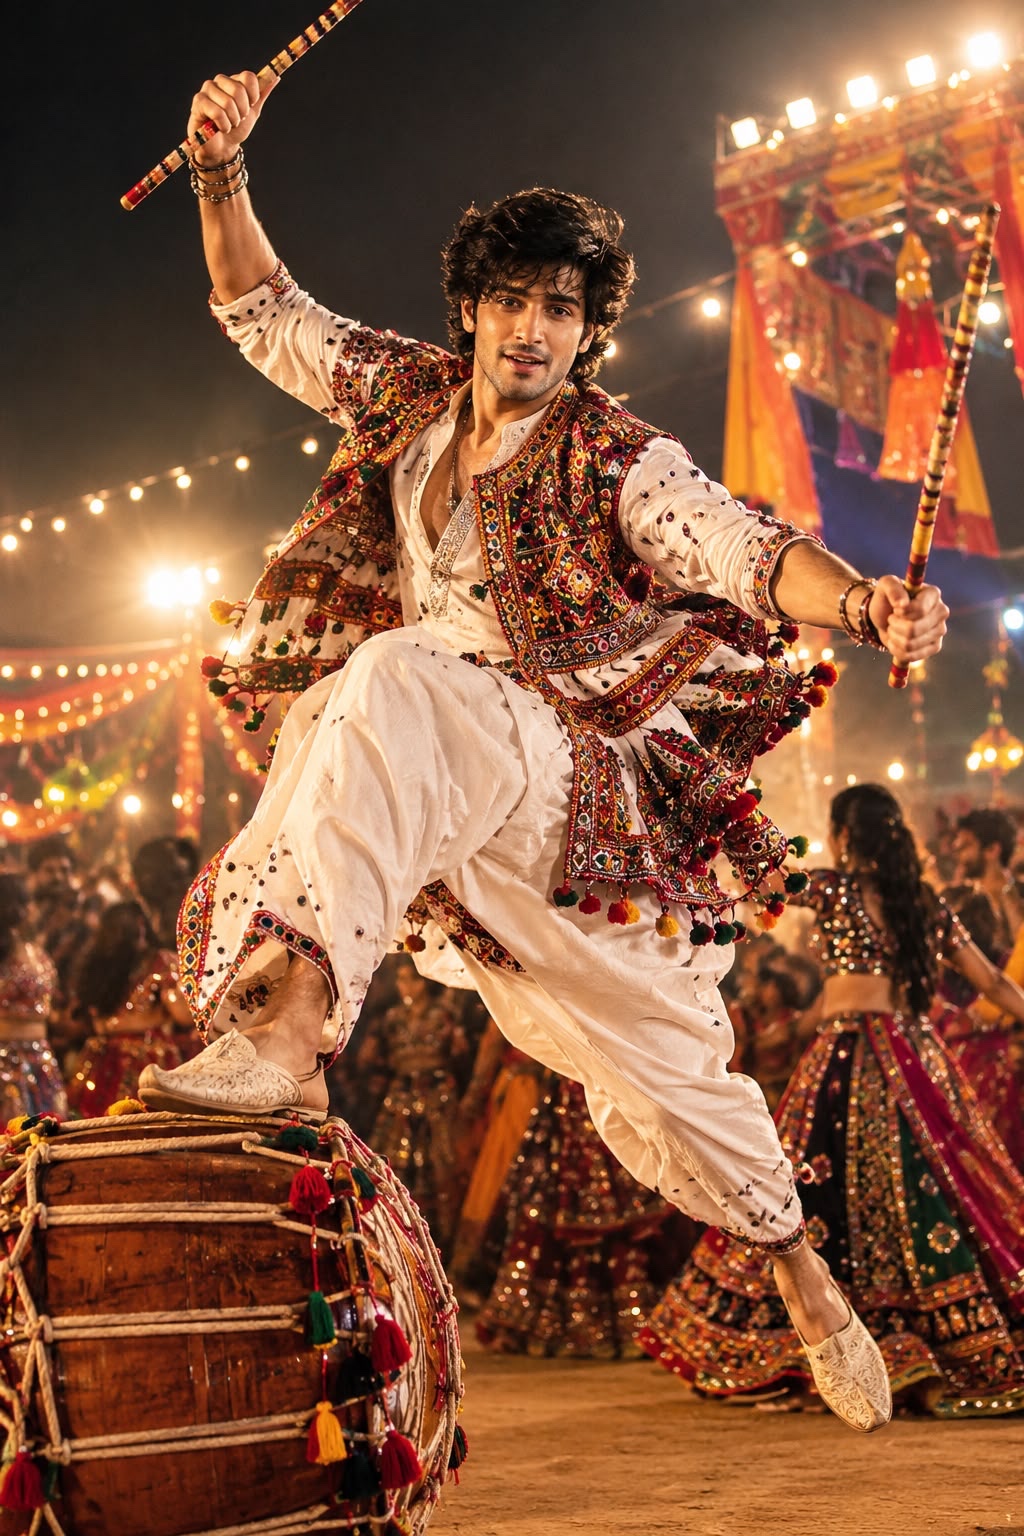
    AI-generated Indian man in white Gujarati festive clothing holding dandiya sticks in a heroic pose with one foot on a decorated dhol.
    AI-generated Navratri Garba hero-pose reference.

    What Does This Photo Look Like?

    The scene centres on a young Indian man holding two decorated dandiya sticks, with one foot planted on a large dhol and the other leg lifted in a dramatic dance pose.

    His white kediyu and dhoti-style pants keep the silhouette clean, while embroidered details, silver jewellery, and colourful tassels add festive texture. Warm backlighting and a softly blurred Garba crowd complete the scene.

    The example image is AI-generated and serves as a visual reference for the composition, outfit, and lighting.

    Copy the Boy Dhol Hero Pose AI Prompt

    ✦ AI PROMPTCopy → paste in ChatGPT / Gemini
    Edit my uploaded photo. If I attached more than one photo of myself, use all of them together to get my face right. Do not redraw my face – keep it exactly as in the original: the same face shape and width, the same cheeks, the same jawline and chin, the same nose shape and width, the same eye shape and spacing, the same eyebrows, the same lip shape, the same skin tone and the same skin texture. Do not slim my face, do not sharpen the jaw, do not enlarge the eyes, do not smooth or airbrush the skin, do not change my age and do not make my features more symmetrical. Change ONLY the clothing, the background and the lighting described below, and keep my head at the same angle as in the photo. A breathtaking cinematic Navratri Garba photography scene of a handsome young Indian man performing a powerful heroic Garba pose. He is wearing a traditional Gujarati white kediyu with intricate colourful mirror work, matching white dhoti-style pants, embroidered traditional mojari, oxidised silver kada and subtle traditional jewellery. His hair is naturally thick, slightly messy and styled in a modern festive look. He is captured in a dynamic jump, with one foot firmly placed on top of a large traditional Gujarati dhol and the other leg lifted dramatically in the air, creating a powerful mid-air dance pose. His body is slightly leaning forward with strong athletic movement. He holds a decorated dandiya stick in each hand, both arms extended dramatically in opposite directions. His expression is confident and energetic, looking slightly toward the camera with a charismatic heroic smile. The dhol beneath his foot is large, beautifully decorated with traditional Gujarati embroidery, colourful tassels and fabric details. Huge Navratri celebration in the background, hundreds of Garba dancers, colourful traditional outfits, glowing string lights, warm golden festival lighting, subtle smoke and atmospheric haze, dramatic backlight, beautiful bokeh, flying fabric and natural motion. Low-angle camera perspective to make him look powerful and larger-than-life, full-body composition, frozen action shot, cinematic Bollywood hero-entry feeling, 35mm lens, shallow depth of field, realistic skin texture, highly detailed mirror work, natural anatomy, realistic hands and feet, dramatic shadows, volumetric lighting, rich cinematic contrast, premium Indian fashion photography, photorealistic, ultra-detailed, energetic Gujarati Navratri atmosphere. No text, no watermark, no extra limbs, no duplicate person, no distorted hands, no deformed feet.

    Chehra same rehne ki guarantee nahi hai. Result ko apni reference photo se compare karo aur zaroorat ho to correction do.

    How to Create Your Own Version

    1. Choose a Clear Reference Photo

    If your image generator supports reference photos, upload a sharp photo of yourself with your face clearly visible. Avoid heavy filters, sunglasses, and strong shadows across your features.

    For a fictional character, you can use the prompt without a personal reference.

    2. Add a Face Preservation Instruction

    When using your own photo, place this instruction before the main prompt:

    “Use the uploaded photo as the identity reference for the main subject. Preserve his face shape, facial features, skin tone, age, and hairstyle as closely as possible. Change the clothing, pose, background, and lighting to match the scene below. Avoid beauty filters, facial slimming, and skin smoothing.”

    A reference photo can guide the result, but it does not guarantee an exact face match. Check the generated face before sharing.

    3. Set a Portrait Composition

    Use 2:3 to match the supplied example. Choose 4:5 for a portrait feed post or 9:16 for a Story or Reel cover.

    Add this line to help keep the action inside the frame:

    “Keep the entire subject, both shoes, both dandiya sticks, and the dhol visible, with comfortable space around the pose.”

    4. Generate and Inspect

    Check the details that make this pose convincing:

    • Each hand holds one separate dandiya stick.
    • One shoe makes clear contact with the dhol.
    • The lifted leg has a natural bend.
    • The face resembles your reference, if supplied.
    • Mirror work and jewellery remain detailed without merging into the skin.

    5. Refine the Problem Area

    If the result is close, request a focused correction while preserving the rest of the image.

    Quick Fixes for Common Problems

    The foot floats above the dhol

    Add: “The supporting shoe rests firmly against the top of the dhol, with a visible contact shadow.”

    Hands or sticks look distorted

    Add: “Two anatomically natural hands, each gripping one separate straight dandiya stick. No fused fingers or intersecting sticks.”

    The crowd distracts from the subject

    Replace “hundreds of Garba dancers” with: “A softly blurred background crowd of Garba dancers, with the main subject clearly separated.”

    The skin looks too polished

    Add: “Natural pores, subtle skin imperfections, realistic facial texture, and restrained retouching.”

    The pose keeps breaking

    Simplify it: keep one foot on the dhol and bend the other knee, with the raised foot closer to the body.

    Optional Negative Prompt

    If your tool provides a separate negative-prompt field, use:

    Extra limbs, duplicate subject, fused fingers, distorted hands, deformed feet, floating supporting foot, bent dandiya sticks, cropped shoes, cropped head, plastic skin, excessive skin smoothing, text, logo, watermark.

    These instructions guide the generation; they cannot guarantee an error-free result.

    Make the Look Your Own

    For a personal variation, change one visual element at a time: the embroidery colours, expression, background decorations, or lighting intensity. Keep the white outfit, decorated dhol, and low camera angle if you want to retain the hero-pose feel.

    Save the full prompt, inspect the anatomy, and refine the small details before exporting your final Navratri portrait.
  • Purani Wedding Photo Restore Karein: Gemini AI Prompt

    Purani Wedding Photo Restore Karein: Gemini AI Prompt

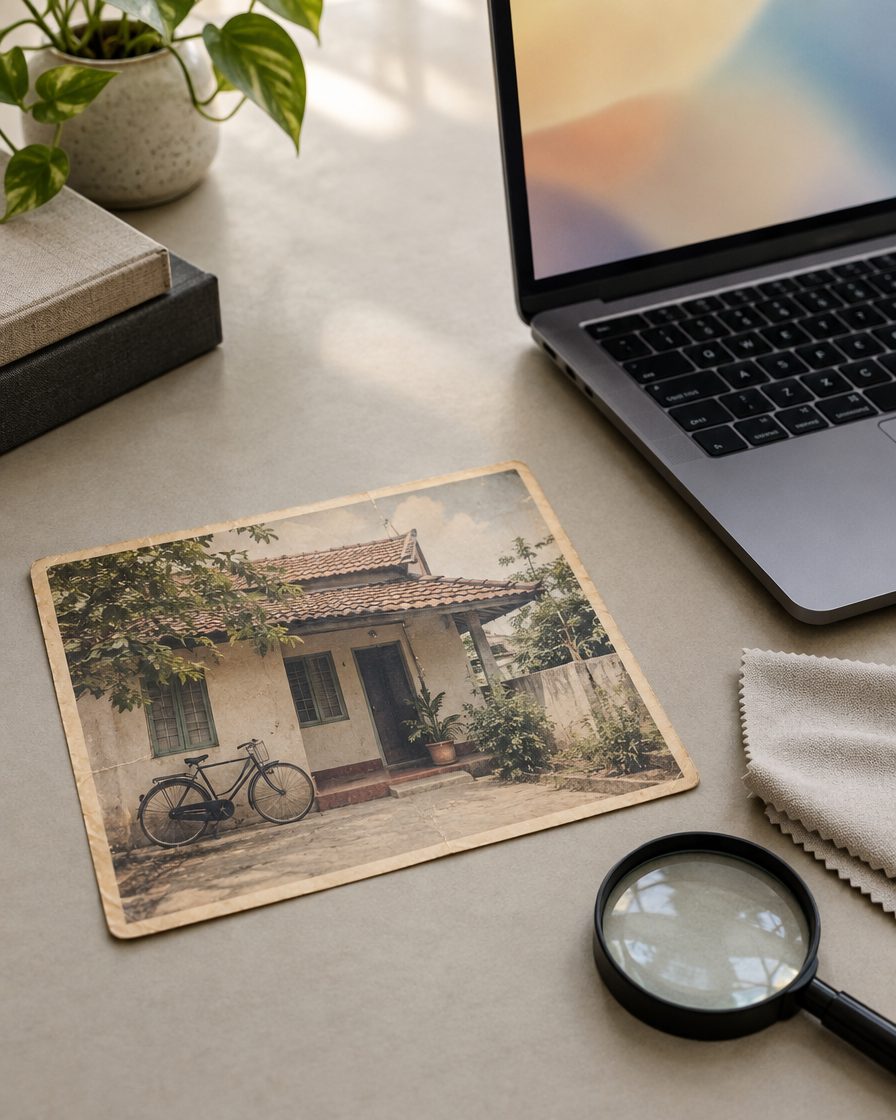
    Nana-nani ya dada-dadi ki purani shaadi ki photo mein scratches aur fading hai? Gemini mein pehle gentle cleanup try karein. Neeche ka prompt, yani AI ko dene wali instruction, original look ko bachate hue damage kam karne ke liye hai.

    Purani Wedding Photo Restore Karein: Gemini AI Prompt
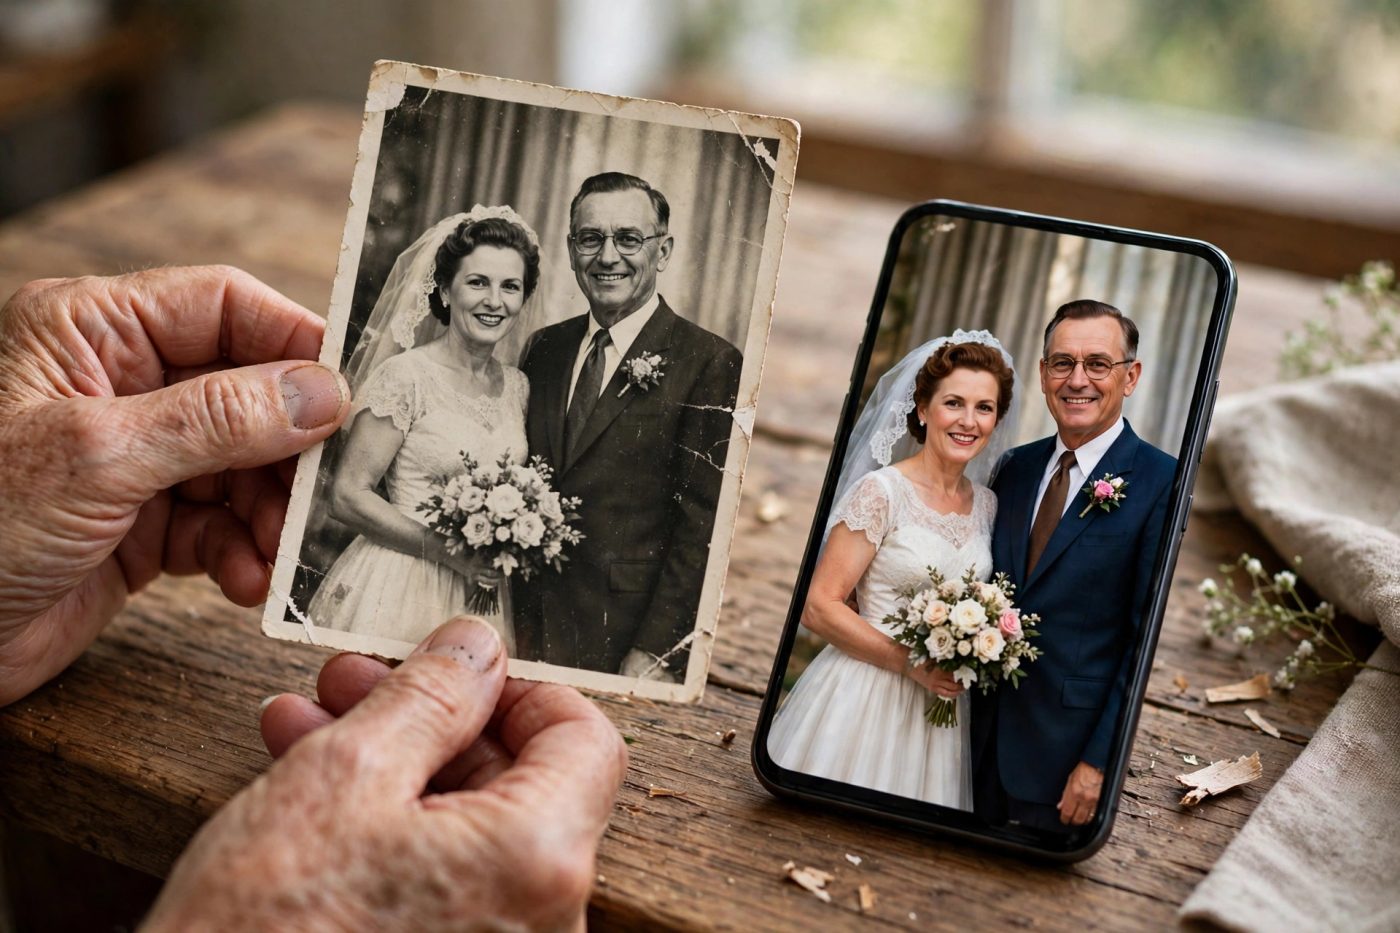
    Restoration idea ki illustration — actual Gemini before-and-after test nahi.

    Pehle original bachayein: scan ki copy par kaam karein. Photo ko seedha scan karein; phone se capture kar rahe hain toh glare aur haath ki shadow se bachein. Original file ko overwrite na karein.

    Copy karein: pehle black-and-white restoration

    ✦ AI PROMPTCopy → paste in ChatGPT / Gemini
    Do not redraw or replace the faces in my uploaded old wedding photograph. Restore the existing photograph conservatively, preserving both people's original facial features, apparent age, expressions, skin texture, body proportions, clothing, jewellery, pose, background and composition. Reduce dust, small scratches, cracks and fading where possible without removing real details. Keep the original black-and-white appearance for this first restoration. Do not add beauty filters, make either person younger, replace outfits, invent facial detail in badly damaged areas or create a new wedding scene. Retain a natural photographic texture. Return only the restored photograph, not a phone mockup or a before-and-after collage.

    Chehra same rehne ki guarantee nahi hai. Result ko apni reference photo se compare karo aur zaroorat ho to correction do.

    Yeh suggested restoration prompt hai. Face match guaranteed nahi; AI missing details ko galat tarah se bana sakta hai. Original aur result ko paas rakhkar aankhon, naak, smile, age aur jewellery ka comparison karein.

    Color chahiye? Cleanup ke baad yeh reply dein

    Colorize the restored photograph gently, keeping the faces, apparent age, original outfits and composition unchanged. Use restrained, plausible colors. Do not replace clothing or invent decorative details.

    Black-and-white photo se kapdon aur skin ke asli rang confirm nahi hote. Colorization AI ka estimate hai. Agar family ko asli saree ya suit ka rang yaad ho, wahi clearly likhein. Har photo mein white dress aur dark suit force na karein.

    Gemini mein short steps

    1. Android par Gemini kholein, sign in karein aur original scan ki copy upload karein.
    2. Upar wala cleanup prompt paste karke send karein. Google photo upload aur editing support document karta hai.
    3. Result zoom karke original se compare karein. Face badle toh us result ko accept na karein; original attach karke gentler cleanup maangein.
    4. Pasand ka result image touch karke hold karein, phir Save tap karein. Family ko bhejte waqt ise AI-restored/colorized copy batayein.

    4K aur access ke baare mein

    Prompt mein 4K likhne se file 4K nahi ban jaati. Download ki actual pixel dimensions check karein. Google ki current guide Nano Banana 2 ke liye bina AI plan 1K aur AI plan ke saath 2K download batati hai. Editing 18+ users ke liye hai; availability aur daily limits account par depend karti hain.

    Sources: Google: old-photo restoration aur colorization examples · Gemini image editing, access aur saving. Is exact family-photo prompt ka hands-on test yahan claim nahi kiya gaya hai.

  • 90s Polaroid Photo Prompt: Gemini Mein Friends Collage Banayein

    90s Polaroid Photo Prompt: Gemini Mein Friends Collage Banayein

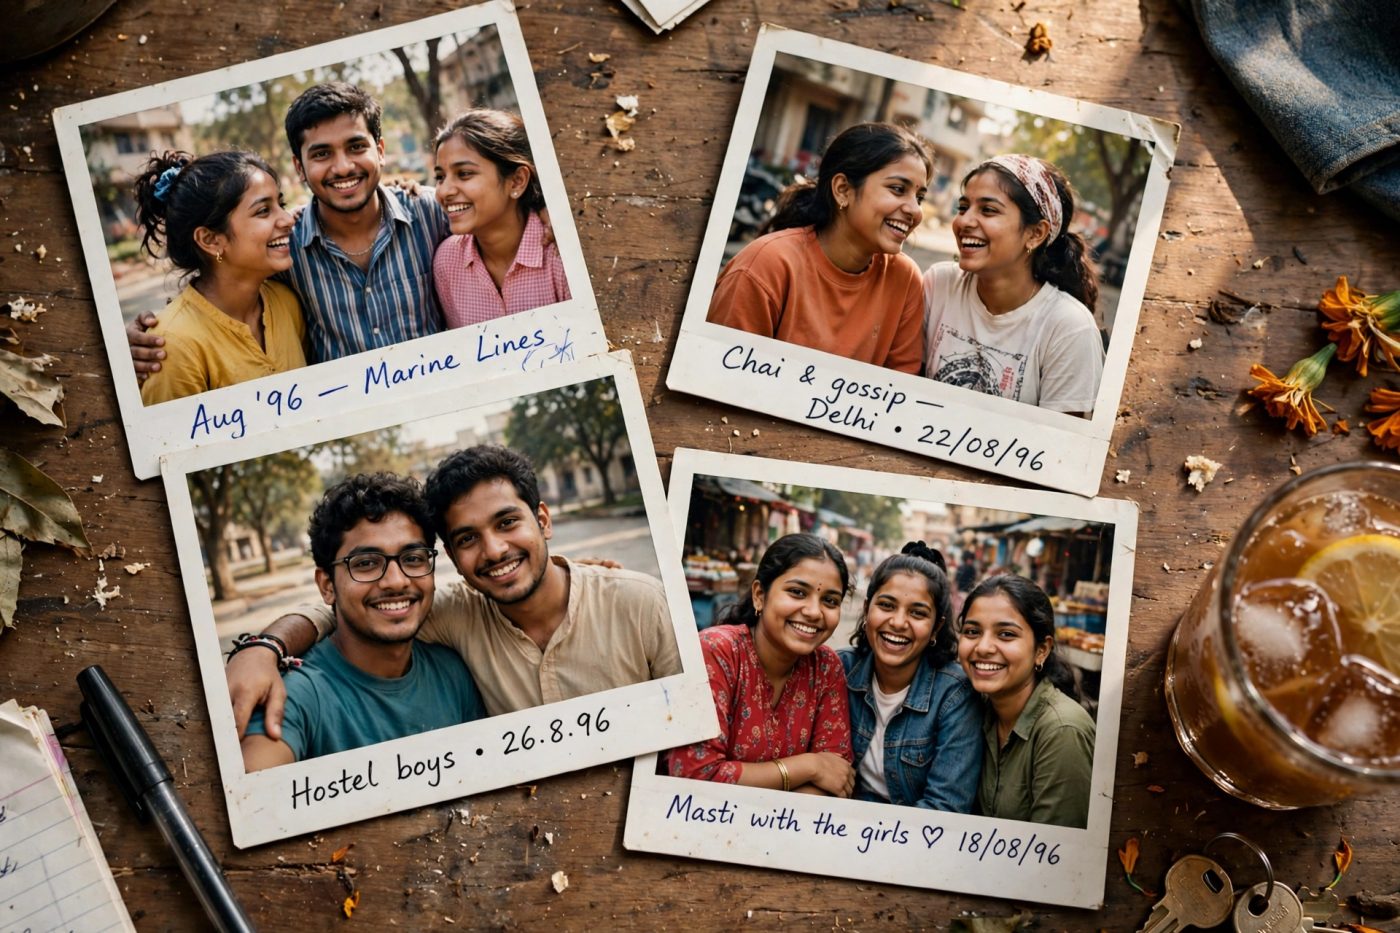
    Apni doston wali photo ko purane album jaisa look dein: wooden table par chaar white-border photos, halki film grain aur “Aug 96” date. Neeche ka prompt, yani AI ko dene wali instruction, Gemini mein try karein.

    90s Polaroid Photo Prompt: Gemini Mein Friends Collage Banayein
    90s collage ka style example — Gemini mein is prompt ka tested output nahi; aapka result alag ho sakta hai

    Kya chahiye: ek clear group photo jismein sabke chehre saaf dikhte hon, aur Gemini mein image editing access. Yeh 1990s se inspired naya edit hoga, asli 1996 ki photo nahi.

    Copy karein: 90s Polaroid collage prompt

    ✦ AI PROMPTCopy → paste in ChatGPT / Gemini
    Do not redraw or replace the faces in my uploaded group photo. Preserve each person's facial features, skin tone, age and distinct identity as closely as possible. Create one photorealistic landscape collage showing exactly four separate Polaroid-style prints scattered naturally on a wooden table. Use the same uploaded group in all four prints, with subtle variations in candid smiles and framing, without adding new people. Give each print a white instant-photo border with a wider bottom edge, gentle 1990s film grain, slightly faded warm colors and realistic skin texture. Keep every face clear and recognizable; do not add heavy grain over faces. On the bottom border of each print write only Aug 96 in small handwritten lettering. Warm natural window light, realistic paper texture and soft shadows. Keep all four prints fully inside the frame. Landscape 3:2 composition. No extra captions.

    Chehra same rehne ki guarantee nahi hai. Result ko apni reference photo se compare karo aur zaroorat ho to correction do.

    Ek collage, chaar files nahi: yeh prompt ek image ke andar chaar photo prints maangta hai. Instagram carousel ke liye alag slides chahiye toh baad mein har print ko alag crop karna hoga.

    Gemini mein kaise banayein?

    1. Android par Gemini app kholein aur sign in karein. Google ki guide ke mutabik photo editing 18+ users ke liye hai; access account aur region par depend karta hai.
    2. Apni clear group photo upload karein. Upar diya copy button dabayein aur prompt ko Gemini ke message box mein paste karke send karein.
    3. Result mein chaar prints, sabke chehre aur date check karein. Apni original photo se likeness compare karein.
    4. Android app mein result image ko touch karke hold karein, phir Save tap karein. Yeh download step Google ki official guide mein diya hai.

    Look ko apne hisaab se badlein

    Date: prompt mein Aug 96 ki jagah apna pasand ka text likhein. Zyada retro look ke liye reply dein: Add subtle film dust and slightly more faded colors, but keep every face clear.

    Chehra ya text galat ho? original photo dobara attach karke reply dein: Keep each person closer to the uploaded group photo. Fix only the faces and the date text; keep the four-print layout. Face match ka koi fixed percentage ya guarantee nahi hai. Date phir bhi galat aaye toh plain border maang kar text editing app mein add karein.

    Celebrity photo? Is guide ka prompt aapke uploaded friends group ke liye hai. Celebrity meet-up jaisa result banane ki guarantee nahi; fictional AI edit ko real meeting ki photo ki tarah share na karein.

    Source: Google Gemini: image upload, editing aur saving. Steps official documentation par based hain; is exact prompt ka Gemini test yahan claim nahi kiya gaya hai.

  • White Chaniya Choli Dandiya Photo: AI Prompt

    White Chaniya Choli Dandiya Photo: AI Prompt

    White mirror-work chaniya choli, gajra aur candid dandiya dance wala photo look banane ke liye yeh prompt (AI ko dene wali instruction) copy karein. Neeche ek AI-generated example hai; aapka result alag ho sakta hai.

    White Chaniya Choli Dandiya Photo: AI Prompt
    AI example — aapka result alag ho sakta hai

    Bonus video: White chaniya-choli movement

    Higgsfield / Wan 3.0 ka 6-second white chaniya-choli motion example, 1080 × 1920. Yeh related animation example hai; article ke exact photo prompt ka measured test nahi.

    Kya chahiye: aapki ek clear photo jismein chehra achhi roshni mein dikhe. Image banane wale AI tool mein apni photo attach karke neeche ka prompt dein.

    Copy karein: White chaniya choli dandiya prompt

    ✦ AI PROMPTCopy → paste in ChatGPT / Gemini
    Do not redraw or replace the main woman's facial features. Use the uploaded photo as the facial reference for the main adult Indian woman only. Preserve her facial features, skin tone and age. Do not apply her face to other dancers. A photorealistic cinematic Navratri Garba photograph of her naturally playing dandiya with another adult woman, their sticks crossing during the dance. Main woman subtly turns her clearly visible face toward the camera with a soft shy smile and direct eye contact, candid rather than stiffly posed. Very long black hair in traditional braids with white gajra woven into them. Elegant white Gujarati lehenga chaniya choli with colorful mirror work, fine embroidery and flowing dupatta. Oxidized silver layered necklace, statement earrings, bangles, maang tikka and subtle nose jewellery. Realistic festive makeup and natural skin texture. Second woman in a distinct colorful Gujarati outfit, engaged in the dance and slightly out of focus. Authentic Garba ground at night with blurred dancers, warm lights, diyas, colorful bokeh and subtle haze. Natural flowing lehenga and dupatta; dandiya crossing frozen clearly. Eye-level close camera, 85mm f/1.8 portrait look, soft rim light, detailed fabric and mirror-work highlights, warm cinematic contrast. Correct hands and fingers, no merged sticks or duplicate people, no text or watermark. Vertical 9:16.

    Chehra same rehne ki guarantee nahi hai. Result ko apni reference photo se compare karo aur zaroorat ho to correction do.

    Result mein kya check karein?

    Main subject ka chehra, haath aur dandiya sticks dekhein. Doosri dancer ka chehra alag ho; sticks aur fingers merge na hon. Agar chehra badal jaaye, original photo dobara attach karke likhein: “Keep my facial features closer to the uploaded photo; change only the outfit and scene.” Face match ki guarantee nahi hoti.

    Photo ka size: 9:16, yani phone screen jaisa vertical frame. Save karne se pehle poora photo aur fine details check karein.

  • Navratri Red Scooter Photo: AI Prompt

    Navratri Red Scooter Photo: AI Prompt

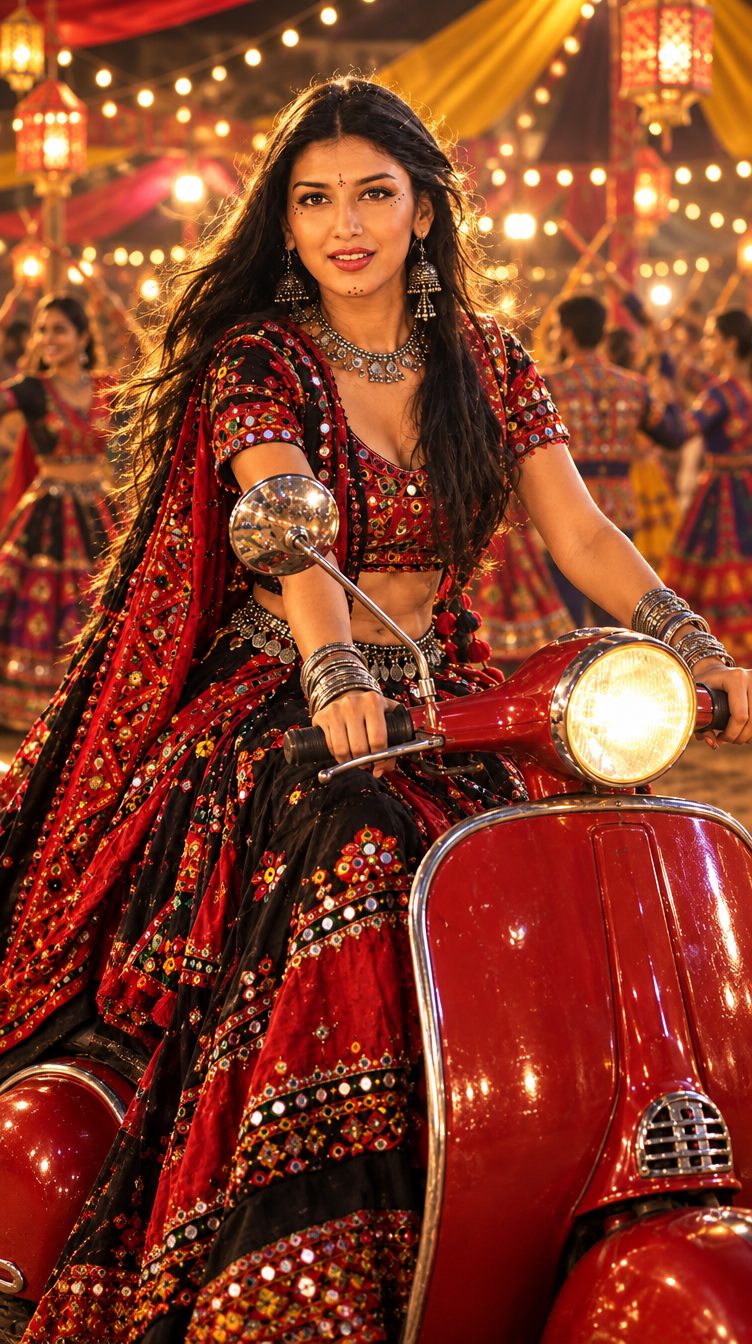
    Red retro scooter, red-black chaniya choli aur golden Garba lights wala photo look banane ke liye yeh prompt (AI ko dene wali instruction) copy karein. Neeche ek AI-generated example hai; aapka result alag ho sakta hai.

    Navratri Red Scooter Photo: AI Prompt
    AI example — aapka result alag ho sakta hai

    Kya chahiye: aapki ek clear photo jismein chehra achhi roshni mein dikhe. Image banane wale AI tool mein apni photo attach karke neeche ka prompt dein.

    Copy karein: Red scooter Garba prompt

    ✦ AI PROMPTCopy → paste in ChatGPT / Gemini
    Do not redraw or replace the main woman's facial features. Use the uploaded reference image as the primary identity and facial reference. Preserve the same facial features, face shape, skin tone, proportions and natural expression; do not redesign or replace her face. Create a photorealistic cinematic portrait of the same adult Indian woman sitting confidently on a glossy vintage red retro scooter at a grand Navratri Garba night. Traditional red and black Gujarati chaniya choli with colorful mirror work, fine embroidery and subtle sequins, naturally draped black-and-red dupatta. Oxidized silver jhumkas, layered necklace and silver bangles. Realistic festive makeup with kajal, eyeliner, warm eyeshadow, natural skin texture, red lipstick and a small bindi. Long flowing black hair. One hand on the handlebar, other relaxed, direct eye contact. Scooter clearly visible with chrome details, round glowing headlight and mirrors, no readable logo. Background: Gujarati Garba dancers with distinct faces, fabric canopies, lanterns, fairy lights and golden bokeh. Warm golden face light, soft hair rim light, realistic chrome reflections and natural shadows. Slightly low angle, medium-full portrait, 50mm f/1.8 look. Rich red and black colors, warm golden highlights, nostalgic cinematic atmosphere. Natural anatomy, correct hands and fingers, detailed fabric. No beauty filter, no text or watermark. Vertical 9:16.

    Chehra same rehne ki guarantee nahi hai. Result ko apni reference photo se compare karo aur zaroorat ho to correction do.

    Result mein kya check karein?

    Chehra, haath aur scooter ka handlebar dekhein. Scooter aur outfit frame mein saaf dikhne chahiye. Agar chehra badal jaaye, original photo dobara attach karke likhein: “Keep my facial features closer to the uploaded photo; change only the outfit and scene.” Face match ki guarantee nahi hoti.

    Photo ka size: 9:16, yani phone screen jaisa vertical frame. Save karne se pehle poora photo aur fine details check karein.

  • Google Flow: Do Photos Se Smooth Video Kaise Banayein

    Google Flow: Do Photos Se Smooth Video Kaise Banayein

    Aap chahte hain video ek photo se shuru ho aur doosri photo par khatam ho? Google Flow mein start aur end frame dekar aisa video banane ki koshish kar sakte hain. Frame matlab video ki ek still photo. Start frame pehli photo hai; end frame aakhri.

    Google Flow: Do Photos Se Smooth Video Kaise Banayein
    AI cover illustration — ye Google Flow ka screenshot, input pack ya actual video result nahi hai.

    Is guide mein ek simple vase shot se shuru karenge: pehle thoda wide view, phir usi vase ka paas se view. Neeche diya prompt practice ke liye suggestion hai; isse perfect result ya same details ki guarantee nahi milti.

    Pehle result dekhein, phir Hindi mein steps samjhein

    Neeche 10-second ka actual Google Flow result hai. Uske baad 1 minute 27 second ki Hindi guide mein wahi input photos aur asli Flow screenshots dikhaye gaye hain. Guide screenshot-based hai; account ke hisab se buttons aur interface alag ho sakte hain.

    Actual AI-generated Flow demo: wide view se vase ke paas.
    Hindi tutorial: do photos, simple prompt, settings, result check aur download.

    Shuru karne se pehle

    Computer ke browser par Google Flow, feature access wala account aur apni do matching photos ready rakhein. Generate karne se pehle current credit cost dekhein. Google ki model guide ke mutabik Gemini Omni Flash 1.1 start/end frames support karta hai; is feature ke liye web use karein. Availability region ke hisab se alag ho sakti hai.

    1. Do aisi photos chunein jo aapas mein match karein

    Ek chhote vase ko table par rakhein. Pehli photo mein vase ke aas-paas thodi jagah dikhayein. Doosri photo usi jagah, usi light aur usi vase ki thodi paas se lein. Vase, leaf aur background ko beech mein badlein nahi.

    Phone ko seedha rakhein aur dono photos mein same shape choose karein. Reel ke liye vertical 9:16 useful hai: yani lambi, phone-screen jaisi image. Ek horizontal aur ek vertical photo se shuru karne par framing milana mushkil ho sakta hai.

    Practice mein bahut bada change mat chunein, jaise ek photo mein empty room aur doosri mein crowded wedding. Pehle ek small camera movement samajhna aasaan rahega.

    2. Flow mein photos lagayein

    Google ke documented desktop steps ke hisab se: project kholein, prompt box ke model name par click karein, phir Video → Frames choose karein. Wide photo ko + Add start frame mein aur paas wali photo ko + Add end frame mein drag karein.

    Dono previews ko pehle dekhein. Agar order ulta hai toh video bhi paas se door jaane ki direction mein ban sakta hai. Photo upload hone ke baad hi next step par jaayein.

    3. Beech mein kya hona chahiye, woh likhein

    Prompt yani AI ko di gayi likhi hui instruction. Ye text Google Flow ke prompt box mein paste karein. Isse image banane wale kisi alag chat mein bhejna zaroori nahi.

    Begin with the supplied start image and move gently toward the supplied end image. Use one slow, steady camera push-in toward the terracotta vase. Keep the vase, leaf, table and background unchanged. Preserve the same daylight and natural shadows throughout. No cuts, no new objects and no sudden camera movement.

    Aap vase ki jagah cup use kar rahe hain toh “terracotta vase” ko “ceramic cup” se badlein. “leaf” ko bhi hata dein agar photo mein leaf nahi hai. Prompt mein wahi objects rakhein jo aapki photos mein hain.

    4. Ek output banakar poora dekhein

    Available settings mein video model, ratio aur duration check karein. Pehle ek output select karein; phir Generate dabayein. AI ka result aane ke baad shuru, beech aur end teenon portions dekhein.

    Sirf pehla frame achha lagna kaafi nahi. Kya vase beech mein shape badal raha hai? Leaf gaayab ho raha hai? Background hil raha hai? Kya ending supplied photo ke kareeb pahunchti hai? In cheezon ko dekhe bina final video save na maan lein.

    Video bigad raha ho toh kya badlein?

    Objects badal rahe hain: Pehle dono input photos compare karein. Unmein hi leaf ya light alag hai toh matching photos se shuru karein.
    Movement bahut tez hai: Ek hi slow push-in rakhein. Saath mein spin, zoom aur flying camera mat maangein.
    Face badal raha hai: Start/end photos dena identity lock ki guarantee nahi. Kisi person ka shot bana rahe hain toh face ko poore clip mein check karein.

    Paid retry se pehle ek specific problem decide karein aur sirf usse related instruction badlein. Bina dekhe baar-baar Generate dabana zaroori nahi.

    5. Video download karein

    Result pasand aaye toh project mein us video asset par hover karein aur More → Download choose karein. Available file type select karein. Ye route Google ki download guide mein diya hai.

    Saved file ko computer par kholkar poora play karein. Video ki actual quality aur shape check karein. Is guide ko fixed 4K ya free-export promise na samjhein; available output options aapke model aur account mein dekhein.

    Frames option nahi dikh raha?

    Browser wala Flow aur Video mode check karein. Selected model ki current feature list dekhein. Option unavailable ho toh extra paid generations karke use unlock karne ki koshish na karein; account/region access check karein.

    Motion clip ready hone ke baad uska opening shot plan karna ho toh simple Reel opening guide se ideas lein. Pehle image-to-video clip banayein, phir final Reel ki editing karein.

  • YouTube Shorts Par Custom Thumbnail Kaise Lagayein

    YouTube Shorts Par Custom Thumbnail Kaise Lagayein

    Shorts ka cover random frame dikh raha hai? Custom thumbnail ka matlab hai apni banayi hui cover image lagana. Is guide mein pehle cover choose karenge, phir computer par YouTube Studio se upload karenge.

    YouTube Shorts Par Custom Thumbnail Kaise Lagayein
    AI se banayi cover illustration — app ka screenshot ya actual video frame nahi.

    4 October 2026 ko checked: YouTube ki current help guide Shorts ke liye desktop Studio mein custom image upload batati hai. Account verified hona chahiye. Official thumbnail guide ke steps neeche simple language mein diye hain. Apne account mein option dikh raha hai ya nahi, pehle woh check karein.

    Pehle ye teen cheezein ready rakhein

    Computer par apne channel ka access, woh Short jiska cover badalna hai, aur JPG ya PNG cover image. Vertical 9:16 design choose karein: yani image ki width ke muqable height zyada ho, phone video jaisi.

    Practice ke liye apne Short ka ek clear frame lein. Chai banane ka video hai toh cup ya chai dalne wala moment choose karein. Kisi aur topic ki attractive photo sirf clicks ke liye lagane se viewer ko galat expectation milega.

    1. Cover mein ek clear subject rakhein

    Cup, face ya final result mein se ek main subject choose karein. Bahut saare tiny photos aur long sentence bharne ki zaroorat nahi. Small screen par bhi samajh aana chahiye ki Short kis cheez ka hai.

    Text use karna ho toh short rakhein. Chai tutorial ke liye “Masala Chai” kaafi ho sakta hai. “Is secret trick se duniya ki best chai” jaisa claim tab na likhein jab video uska proof nahi deta.

    2. Important cheez edges se door rakhein

    Subject aur useful text ko beech ke area mein rakhein. Har jagah thumbnail ek jaisa crop dikhega, aisa assume na karein. Design ko chhota karke dekhein: agar text padhne ke liye zoom karna pade toh usse bada karein ya words kam karein.

    Ek simple suggested layout: centre mein cup, upar chhota title, background mein kam clutter. Ye design suggestion hai, YouTube ka compulsory template nahi.

    3. YouTube Studio se image upload karein

    1. Computer par YouTube Studio kholein.
    2. Content mein jaakar Shorts select karein.
    3. Apna Short kholein aur edit/details screen par jaayein.
    4. Thumbnail section ke Upload file se apni cover image choose karein.
    5. Preview dekhein aur SAVE karein.

    Save ke baad cover har jagah turant update hona zaroori nahi. YouTube ke mutabik changes dikhne mein waqt lag sakta hai. Baar-baar same file upload karne se pehle thoda baad dobara check karein.

    Upload file option nahi mil raha?

    Pehle computer par Studio use karna confirm karein. Sahi channel aur sahi Short khula hai, ye bhi dekhein. Account verification check karein; yahan verified ka matlab channel ke naam ke paas blue/grey badge ki guarantee nahi hai.

    Phir bhi option na mile toh Studio ki help se apne account ki availability check karein. Sirf thumbnail button ke liye existing Short delete karke re-upload mat karein. Isse us post ki continuity aur comments khone ka risk hota hai.

    Image select nahi ho rahi?

    File ko pehle computer par kholkar dekhein. Sahi JPG/PNG export hai ya sirf filename badla hai? Studio jo size ya format error dikhaye uske hisab se file dobara export karein. Platform limits badal sakti hain, isliye purane tutorial ki ek fixed file-size number par depend na karein.

    Kya cover badalne se views badhenge?

    Achha cover video ka topic samajhne mein madad kar sakta hai, lekin views ki guarantee nahi hai. Hook, yani video ki shuruaat, aur actual content par bhi kaam karein. Thumbnail aur video ko ek hi promise dena chahiye.

    Agar aap cover ka effect dekhna chahte hain, badalne ki date note kar lein. Saath hi title aur poora content strategy badal denge toh farq kis cheez se pada, samajhna mushkil hoga. Ek result ko har future Short ke liye rule na banayein.

    Quick final check

    Image sahi Short se related hai. Main subject clearly dikh raha hai. Text chhote size mein readable hai. Upload aur Save complete hue. Public appearance dobara check ki. Cover mein aisa result promise nahi kiya jo video mein hai hi nahi.

    Reel ya Short ki opening bhi improve karni ho toh simple opening-shot guide se ideas lein.

  • Lightroom Prompt to Edit: Photo Badalne Ke 5 Easy Prompts

    Lightroom Prompt to Edit: Photo Badalne Ke 5 Easy Prompts

    Photo mein dull sky, purani scratches ya distracting background hai? Lightroom desktop ka Prompt to Edit feature photo mein badlav ke liye likhi hui instruction leta hai. Isi instruction ko prompt kehte hain. Neeche pehle ek simple edit ka tarika hai, phir apni photo ke hisab se chunne ke liye paanch prompt ideas.

    Lightroom Prompt to Edit: Photo Badalne Ke 5 Easy Prompts
    AI se banayi cover illustration — Lightroom ka actual editing result nahi.

    4 October 2026 update: Adobe ne ise Lightroom desktop ka early-access feature bataya hai. Output options mein Nano Banana 2 ke 2K aur 4K choices hain. Mobile ya Lightroom Classic mein wahi option maan kar na chalein. Adobe ki official guide mein current steps dekhein.

    Aapko kya chahiye

    Desktop Lightroom mein feature access, ek photo jise edit karne ki permission aapke paas ho, aur original ki safe copy. Ye guide free ya unlimited generation ka promise nahi karti. Generate karne se pehle app mein apna available credit balance dekhein.

    Pehla edit: sky ko natural sunset banayein

    Aisi outdoor photo choose karein jisme sky clearly dikh raha ho. Ek saath face, clothes, sky aur background sab badalne ki jagah pehle sirf sky par kaam karein. Isse result compare karna aasaan rahega.

    1. Lightroom mein photo kholein aur left panel se Prompt to Edit select karein.
    2. Neeche diya sunset prompt Prompt field mein paste karein.
    3. Output settings mein available model aur resolution choose karein; phir Generate dabayein.
    4. Nayi image ko original se compare karein. Adobe ke mutabik generated result DNG file ke roop mein milta hai.

    Apni photo ke liye ek prompt choose karein

    Ye paanch alag choices hain; inhe ek ke baad ek chalana zaroori nahi. Prompts suggested starting points hain. AI aapki photo ke hisab se alag result de sakta hai.

    1. Natural sunset sky

    Replace only the dull sky with a soft natural sunset. Match the direction of light in the original photo. Preserve the buildings, trees, people and their facial features. Keep the colours believable, without an orange filter over the whole image.

    Agar photo midday ki hai aur strong shadows hain, dramatic sunset unnatural lag sakta hai. Tab “soft natural sunset” ko “soft lightly clouded blue sky” se badlein.

    2. Purani photo ki scratches

    Reduce visible dust and scratches in this old photograph. Preserve the original composition, faces, clothing and small meaningful details. Keep natural texture and gentle grain. Do not invent missing facial details or make the image look like a modern studio portrait.

    Missing detail ko AI sahi tarah recover karega, aisa maan kar na chalein. Family photo mein aankhon, jewellery aur kapdon ke pattern ko original se zaroor milayein.

    3. Background ka dustbin hatayein

    Remove the small dustbin in the background. Fill that area naturally using the surrounding ground and wall. Preserve the main subject, their face and clothing, and the original lighting. Do not remove other objects.

    Photo mein dustbin nahi hai toh “small dustbin” ko actual unwanted object se replace karein, jaise “red plastic chair”. Ek baar mein ek object target karein.

    4. Black-and-white photo ko soft colour

    Add subtle, believable colour to this black-and-white photograph. Keep the original faces, composition and texture. Use restrained colours and natural skin tones. Avoid overly saturated clothing or a modern glossy look.

    Ye creative colour interpretation hai. Purani photo mein kapde ka original rang kya tha, AI ko automatically maloom nahi hota. Rang maloom ho toh prompt mein clearly likhein.

    5. Portrait mein distracting wall marks

    Clean the distracting stains on the wall behind the person. Preserve the person's face, hair, skin texture and clothing. Keep the wall's original colour and the existing light and shadows. Do not smooth or retouch the person's skin.

    Result save karne se pehle

    Image ko bada karke face, fingers, hair edges aur straight lines dekhein. Sirf overall colour pasand aane par accept na karein. Agar unwanted changes aayein, original se dobara ek smaller edit try karein; baar-baar generate karne se pehle credit balance check karein.

    Final photo ko Lightroom ke normal export option se save karein aur saved file ko kholkar dekhein. Original alag rakhein, taaki baad mein comparison ya different edit kar sakein.

    Option nahi dikh raha?

    Pehle check karein ki aap desktop Lightroom use kar rahe hain aur app updated hai. Early access ki availability aapke setup mein alag ho sakti hai. Button nahi milne par mobile ke unrelated tool mein ye steps force na karein; official guide aur app ke help options dekhein.

    Face badalne ki problem ho toh AI edit mein chehra consistent rakhne ka guide padhein.

  • Edits Film Festival 2026: Simple Clip Se Cinematic Reel

    Edits Film Festival 2026: Simple Clip Se Cinematic Reel

    Aapke phone mein chai, baarish ya ghar ki balcony ka ek simple clip hai? Usi se ek chhoti, achhi tarah edited story banane ka plan yahan milega. Cinematic ka matlab sirf dark filter nahi: saaf subject, soch-samajhkar chune shots aur sahi jagah sound bhi zaroori hain.

    Edits Film Festival 2026: Simple Clip Se Cinematic Reel
    AI se banayi cover illustration — app ka screenshot ya actual video frame nahi.

    Festival update, 4 October 2026: Meta ki announcement mein submission ki last date 8 October 2026 di gayi hai. Entry original honi chahiye aur poori Reel Edits mein banani hai. Submit karne se pehle official guidelines dobara dekh lein; announcement mein exact closing time nahi diya gaya.

    Shuru karne se pehle

    Phone mein Edits app aur apne shoot kiye clips rakhein. Pehle ek chhoti story choose karein: jaise “baarish ke din chai ka break”. Neeche ek suggested practice recipe hai. Ye festival ka compulsory format ya winning formula nahi hai.

    1. Teen shots se story banayein

    Jagah: window aur table ka thoda wide shot. Isse viewer samjhega scene kahan hai.
    Action: cup mein chai daalne ka paas se shot. Camera ko stable rakhein.
    Ending: window ke paas ready cup. Is frame par kahani khatam karein.

    Agar sirf ek usable clip hai, uska strongest moment choose karke short edit banayein. Ek hi footage ko baar-baar zoom karke teen alag shots dikhana zaroori nahi. Extra footage shoot karein toh light aur cup ki position milti-julti rakhein.

    2. Clips ko isi order mein rakhein

    Edits mein project banakar apne clips add karein. Timeline, yani woh strip jahan clips ka order dikhta hai, mein jagah → action → ending rakhein. Har clip ke shuru aur end ka bekaar hissa hata dein. Isko trim karna kehte hain.

    Preview dekhein: kya cup mein chai dalne se pehle hi shot kat raha hai? Toh action poora hone tak rehne dein. Har shot ko same duration dena zaroori nahi. Story samajhne ke liye jitna waqt chahiye, utna hi rakhein.

    3. Colour ko simple rakhein

    Agar filter use karein toh halka effect choose karein. Cup safed hai toh edit ke baad bhi natural lage. Teenon shots mein bahut alag brightness ya colour nazar aaye toh unhe ek jaisa feel dene ki koshish karein. Har shot par alag dramatic filter lagane se story toot sakti hai.

    4. Pehle asli sound sunein

    Chai dalne ya baarish ki awaaz usable hai toh usse sunai dene dein. Music add karte waqt uski volume itni kam rakhein ki main sound dab na jaaye. Sirf wahi music use karein jise aap apni Reel mein use kar sakte hain.

    Text chahiye toh ek short line kaafi hai: “Baarish. Chai. Thoda sa break.” Text ko cup ke upar na rakhein. Ek baar bina sound aur ek baar sound ke saath preview dekhein: dono mein scene samajh aana chahiye.

    5. Festival caption taiyar karein

    Official announcement ke mutabik caption mein content aur use kiye Edits features batane hain. Saath mein #EditsFilmFestival aur @metaindia, @weareyuvaa tags chahiye. Neeche sample ko apne actual edit ke hisab se badlein; jo feature use nahi kiya, uska naam na likhein.

    Baarish ke din ek chhota chai break. Apne phone footage ko Edits mein trim karke, colour adjust karke aur music add karke ye Reel banayi.
    #EditsFilmFestival @metaindia @weareyuvaa

    Publish se pehle ye check karein

    Footage aapka apna hai. Story shuru se end tak samajh aa rahi hai. Text padhne layak hai. Sound achanak bahut loud nahi hota. Caption mein sirf actual features likhe hain. Festival rules aur deadline official page par dobara check kiye hain.

    Common confusion

    Kya AI video banana zaroori hai? Is guide mein AI generation ki zaroorat nahi; apne phone footage se shuru karein.
    Kya ye ready template hai? Ye shot aur editing plan hai. Aapko apne clips Edits mein arrange karne hain.
    Kya same settings sab clips par chalengi? Lighting alag hogi, isliye ek fixed filter value ko har clip par copy na karein.

    Reel ki shuruaat sochne mein dikkat ho toh teen simple opening shots ka guide bhi dekhein. Festival entry ke liye editing Edits mein hi karein.

  • Navratri Reel Ki Shuruaat Kaise Karein: VN Mein 3 Simple Shots

    Navratri Reel Ki Shuruaat Kaise Karein: VN Mein 3 Simple Shots

    Navratri ki clips phone mein hain, lekin reel shuru kahan se karein? Pehle teen chhote shots chunein: outfit ka detail, dandiya ki movement aur aapka poora look. Is guide mein unhe VN mein jodkar ek simple opening banayenge. AI optional hai; apni recorded clips se bhi poora edit kar sakte hain.

    Navratri Reel Ki Shuruaat Kaise Karein: VN Mein 3 Simple Shots
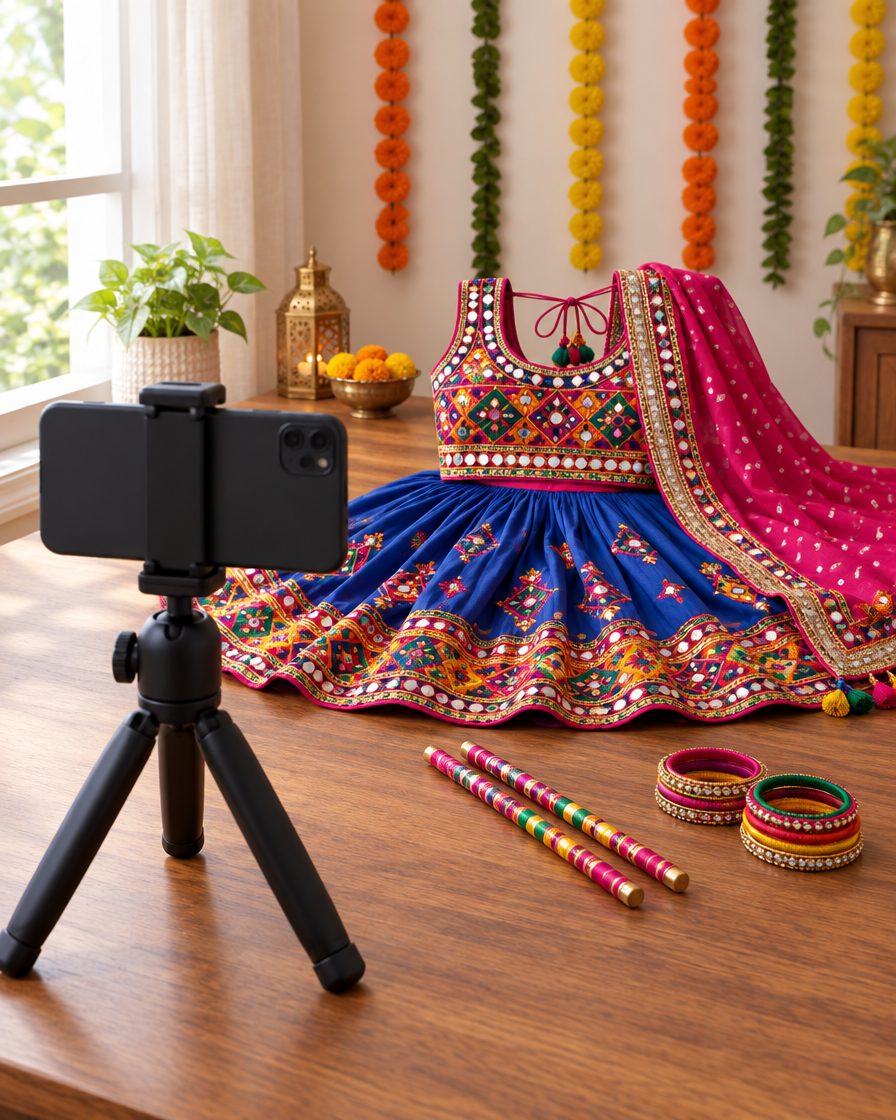
    AI illustration: festive filming setup. Yeh VN app ka screenshot nahi hai.

    Video example: Dandiya movement shot

    Higgsfield / Wan 3.0 ka 6-second dandiya movement example, 1080 × 1920. Yeh source-shot example hai, VN mein bana finished 3-shot edit nahi.

    Kya chahiye

    • Phone mein VN video editor.
    • Teen saaf vertical clips: kapdon ya jewellery ka detail, dandiya ka shot aur poora look.
    • Agar music lagana ho toh aisa audio jo aap apni reel mein use kar sakte hain.

    Pehle yeh teen clips record karein

    1. Kapdon ka detail: dupatte ki embroidery ya bangles ko paas se record karein. Phone stable rakhein aur thodi movement dikhayein.
    2. Dandiya ka shot: dono sticks ko dheere se ek baar milayein. Haath aur sticks screen ke andar rakhein.
    3. Poora look: phone thoda door rakhein, saamne dekhein aur halka sa turn lein. Sir aur outfit ka zaroori hissa na kate.

    Har clip mein action se thoda pehle aur baad ka hissa bhi record karein, taaki edit karte waqt kaatne ki jagah mile. Diya, dandiya ya fabric ko camera lens ke bahut paas laana zaroori nahi.

    VN mein clips jodein

    Timeline screen ke neeche clips ki line hoti hai. Yahin aap decide karte hain ki kaunsi clip pehle chalegi aur kitni der dikhegi.

    1. VN mein naya project shuru karein aur apni teen clips add karein. Order rakhein: detail, dandiya, poora look.
    2. Vertical reel ke liye video ratio 9:16 chunein. Preview mein dekhein ki sir ya haath crop toh nahi ho rahe.
    3. Pehli clip select karein. Dono kinaron ko andar kheenchkar extra shuruaat aur ending hata dein. Ise trim karna kehte hain.
    4. Beech se kaatna ho toh us jagah timeline rok kar Split use karein. Faltu hissa select karke hata dein.
    5. Baaki clips bhi chhoti karein. Practice ke liye lagbhag ek second har shot se shuru kar sakte hain; jahan action adhura lage, us clip ko thoda lamba rakhein.
    6. Poora sequence chala kar dekhein. Pehli baar mein fancy transition chhodkar seedhe cuts rakhein—ek clip khatam, doosri shuru.

    Trim, Split aur ratio ke controls VN ki official beginner guide mein bhi dikhaye gaye hain. Aapke app version mein button ki jagah alag ho sakti hai.

    Music kab lagayein

    Pehle bina music ke dekhein ki opening samajh aa rahi hai. Phir audio add karein aur sunte hue clip badalne ki jagah adjust karein. Beat ka matlab gaane mein baar-baar aane wali taal hai. Har gaane ki beat teen second par nahi aati.

    Video save karein

    Preview mein outfit, haath aur light check karein. Export/Save se edited video phone mein save karein. Shuruaat mein app ki suggested export settings use kar sakte hain; 60fps karna zaroori nahi. Saved video gallery mein chala kar sound aur cuts dobara dekhein.

    Koi decoration ki clip nahi hai? Yeh optional images use karein

    Neeche ke prompts photo banate hain, moving video nahi. Gemini mein ek prompt paste karke image banayein, save karein aur apne edit mein add karein. Selfie upload karne ki zaroorat nahi. Gemini image help.

    Optional image 1: Festive lights

    Reel ke beech lagane ke liye ek still image. Isme movement nahi hogi.

    ✦ AI PROMPTCopy → paste in ChatGPT / Gemini
    Create a still image of warm fairy lights and marigold garlands decorating an empty festive corner. Soft amber glow, simple composition, no people, no text, no logos, no watermark. Vertical 9:16.

    Result check karke use karein. App ki availability, limit aur cost aapke account par depend karti hai.

    Optional image 2: Colourful fabric detail

    Festive mood dikhane ki illustration; kisi actual product ki photo nahi.

    ✦ AI PROMPTCopy → paste in ChatGPT / Gemini
    Create a still close-up illustration of colourful silk fabric with delicate gold embroidery resting on a wooden surface, soft warm light, realistic fabric texture. No people, no hands, no text, no logos, no watermark. Vertical 9:16.

    Result check karke use karein. App ki availability, limit aur cost aapke account par depend karti hai.

    Optional image 3: Diya aur phool

    Aap apni reel mein is still image ko decoration ke shot ki jagah rakh sakte hain.

    ✦ AI PROMPTCopy → paste in ChatGPT / Gemini
    Create a still image of one brass diya on a wooden table with a few marigold petals nearby, warm gentle glow and a softly blurred festive background. No people, no hands, no text, no logos, no watermark. Vertical 9:16.

    Result check karke use karein. App ki availability, limit aur cost aapke account par depend karti hai.

    Aam dikkat aur uska seedha hal

    • Opening jaldi-jaldi nikal jaati hai: jis shot ko samajhne ka time nahi mil raha, use thoda lamba karein.
    • Photo hil nahi rahi: AI se banayi still image mein movement nahi hoti. Recorded clip use karein, ya image ko still hi rakhein.
    • Kapde ka colour galat dikh raha hai: heavy filter kam karein. Kisi shop ka product dikhate waqt uski asli photo ya video use karein; AI fabric ko product ka proof na banayein.

    Kya teen second mein views badhenge?

    Yeh teen shots arrange karne ka practice idea hai, views ka formula nahi. Opening itni saaf honi chahiye ki dekhne wale ko turant pata chale reel mein kya hai. Reel ki baaki length apne footage aur story ke hisaab se rakhein.

    Aur editing ideas ke liye Creator Kit dekhein.

WhatsAppTelegram